An Acrylic Led Board combines a clear acrylic panel with carefully positioned light-emitting diodes. It can display names, logos, directions, prices, or decorative graphics. Unlike a flat printed sign, it uses light to make selected edges, letters, or engraved patterns appear bright. The acrylic works as a light guide. Tiny surface cuts scatter light across the design, creating an even visual effect when the LEDs are switched on.
It looks simple.
In practice, performance depends on several technical choices. Acrylic thickness affects strength and light distribution. LED spacing influences brightness and visible dark areas. The engraving depth, surface finish, power supply, and mounting position also matter. A qualified sign maker usually tests a sample before producing the final panel. This step can reveal uneven illumination, excessive glare, or weak color reproduction. Experience matters here, because a design that looks excellent on a screen may appear different in a real shop window.
This guide explains what an Acrylic Led Board is and how it works. It examines the roles of acrylic, LEDs, engraving, wiring, and heat management. It also considers indoor and outdoor installation requirements, cleaning methods, and practical maintenance. Some boards are promoted as maintenance-free, but that description is not always realistic. Dust, loose connections, aging LEDs, and unsuitable power supplies can reduce performance over time. Reliable results come from accurate design, suitable materials, professional installation, and regular inspection. The technology is accessible, but good results require more than simply adding lights to plastic.
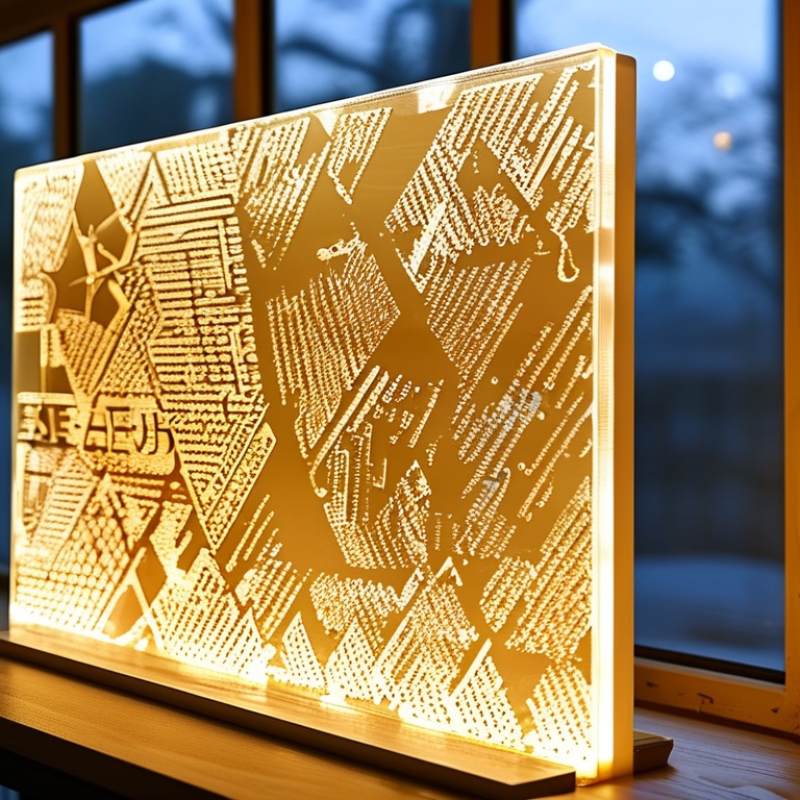
An acrylic LED board is a lighted display panel made from acrylic and embedded LEDs. It can show text, symbols, images, or simple colors.
The acrylic sheet forms the visible surface. Its smooth finish spreads light across the panel and protects internal parts.
Clear, frosted, or colored acrylic creates different visual effects.
The main components include LED modules, a circuit board, a power supply, wiring, and a mounting frame. Some boards also use a diffuser or engraved light guides.
LEDs produce light when electric current passes through them. The circuit board controls brightness, color, and display patterns.
A power supply converts incoming electricity into the lower voltage required by the LEDs. Without stable voltage, flickering or uneven brightness may appear.
In practical use, light enters the acrylic through its edges or passes behind its surface. Tiny engraved lines, dots, or textured areas redirect that light toward viewers.
Even spacing matters. A small gap between LED modules can create visible dark zones.
Heat also deserves attention, although acrylic itself does not remove heat efficiently. Designers often add ventilation or a metal support layer.
I have found that a brighter setting is not always better; excessive intensity can reduce readability and shorten LED life.
The board may look simple, but its performance depends on careful alignment, wiring, and material selection.
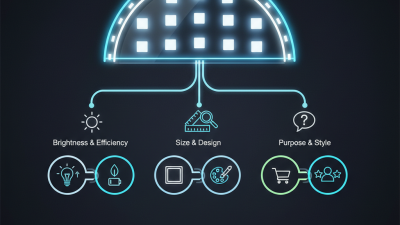
An acrylic LED board uses a clear PMMA panel to guide light from LEDs into a flat viewing surface. Light usually enters through the panel’s edge, rather than shining directly at the viewer. The acrylic has a refractive index near 1.49, so much of the light remains trapped by internal reflection. It travels through the panel like a narrow beam inside glass. Tiny laser-etched dots, grooves, or printed scattering patterns then interrupt that path. These features redirect light outward and create visible illumination.
The process sounds simple. It is not perfectly uniform. Light is strongest near the LED entry points and weaker farther away. Designers adjust dot spacing, pattern density, LED distance, and panel thickness to balance this falloff. A thicker panel may guide light effectively, but it can increase weight and edge brightness. The U.S. Department of Energy’s 2023 Solid-State Lighting R&D Opportunities report identifies 200-lumen-per-watt-class LED performance as an important efficiency benchmark. However, panel efficiency depends on optical losses, not LED output alone. The International Energy Agency’s 2024 Energy Efficiency report also notes that efficient lighting reduces electricity demand, although real savings depend on operating hours and controls. That caveat matters. A bright acrylic board can still waste energy when its light extraction pattern is poorly engineered. Even small surface scratches or cloudy edges can scatter light unpredictably. Testing at several viewing angles remains essential.
An acrylic LED board is a clear panel that displays graphics through controlled illumination. It usually combines acrylic, LEDs, wiring, and a protective frame. When LEDs enter the panel’s edge, light travels through the material. Engraved or printed areas scatter that light and appear brighter. The effect resembles glowing lines suspended inside glass.
The process begins with preparing a precise digital graphic. The design should consider viewing distance, line thickness, and lighting direction. A CNC router or laser engraver then creates the graphic on the acrylic surface. After machining, the panel needs careful cleaning. Dust can create dull spots and unwanted shadows. LEDs are mounted along one or more edges, depending on the panel size. A diffuser may soften harsh points and improve uniform brightness. Wiring must match the correct voltage and include secure insulation. I always test the lighting before closing the frame.
During assembly, the acrylic sits evenly inside a rigid holder. Small gaps can weaken the visual effect. Screws should be tightened gently, because acrylic can crack under pressure. A final inspection checks brightness, color consistency, cable routing, and surface marks. Some designs still need adjustment. Engraving depth, for example, may look different under real lighting than on a monitor. Careful notes from each test make the next board more reliable. Safety remains important, especially around power supplies and heat. When uncertain, a qualified professional should inspect the electrical connections.
| Step | Production Stage | What Happens | Typical Materials or Tools | Key Output | Quality Check |
|---|---|---|---|---|---|
| 1 | Artwork and Layout | The graphic is converted into production-ready vector artwork, with illuminated areas, cut lines, mounting holes, and cable locations defined. | Vector design software, measured drawings, color references | A finalized digital layout | Text, dimensions, clearances, and viewing orientation are verified before fabrication. |
| 2 | Acrylic Selection | Acrylic sheet is selected according to the desired transparency, diffusion, color appearance, size, and structural requirements. | Cast or extruded PMMA sheet; clear, translucent, or opal finish | A suitable light-transmitting face or panel | The sheet is checked for scratches, haze, thickness consistency, and color uniformity. |
| 3 | Cutting and Shaping | The acrylic is cut to the required outline. CNC routing, laser cutting, or sawing may be used depending on the design and sheet type. | CNC router, laser cutter, saw, drill, deburring tools | A precisely shaped acrylic component | Edges, corners, holes, and overall dimensions are compared with the approved drawing. |
| 4 | Graphic Application | The visual design is applied by direct printing, vinyl application, engraving, film lamination, or a combination of techniques. | UV-curable inks, translucent film, vinyl, engraving equipment | The visible illuminated graphic | Color, registration, opacity, adhesion, and legibility are inspected under normal and powered conditions. |
| 5 | Light-Source Planning | LED modules or strips are positioned to distribute light across the acrylic without excessive bright spots or dark zones. | LED modules or strips, aluminum channels, wiring, connectors | A planned illumination layout | LED spacing, viewing angle, heat clearance, polarity, and access for maintenance are checked. |
| 6 | Electrical Assembly | LED components are connected to a suitable low-voltage power supply. Parallel wiring is commonly used so one failed branch does not turn off the entire sign. | LED components, low-voltage driver, cable, terminals, fuse, switch | A functioning and serviceable lighting system | Voltage, current, polarity, insulation, grounding, and connector security are tested. |
| 7 | Frame and Diffusion Assembly | The acrylic face is installed with a backing panel, spacer, frame, or enclosure. Diffusion distance is maintained to improve illumination uniformity. | Aluminum or plastic frame, backing panel, spacers, fasteners, diffuser | A mechanically stable illuminated board | The face is flush, secure, clean, and free from visible pressure marks or trapped particles. |
| 8 | Illumination Testing | The board is powered in a controlled environment to evaluate brightness, color consistency, uniformity, flicker, and heat behavior. | Power meter, light meter, camera, thermal inspection tools | A verified lighting result | No dark areas, obvious hotspots, abnormal noise, loose connections, or excessive heat should be present. |
| 9 | Final Finishing and Installation | Protective films are removed, surfaces are cleaned, mounting hardware is fitted, and the board is installed in its intended location. | Microfiber cloth, non-abrasive cleaner, brackets, anchors, mounting hardware | A finished, ready-to-use acrylic LED board | The board is level, securely mounted, visibly clean, correctly wired, and easy to access for servicing. |
What Is an Acrylic LED Board and How Does It Work?
Acrylic LED boards combine a transparent acrylic sheet with strategically placed light-emitting diodes. Edge-lit models send light through the panel’s edges. Laser engraving or printed graphics then scatter that light across selected lines and shapes. Direct-lit boards place LEDs behind the sheet, creating stronger illumination for larger signs. Raised-letter, engraved, and flexible versions serve different design needs.
Common features include low heat, slim construction, adjustable brightness, and sharp nighttime visibility. Acrylic also resists moisture better than many paper-based sign materials, although its surface can scratch easily. The U.S. Department of Energy reports that LED technology uses at least 75% less energy than incandescent lighting and can last up to 25 times longer. That advantage supports continuous use in reception areas, retail displays, menus, directional signs, and exhibition booths. Grand View Research has identified digital signage as a growing global market, driven partly by demand for energy-efficient visual communication. Still, market growth does not guarantee every board performs well. Uneven brightness remains a common installation mistake.
Tips: Choose edge-lit designs for fine lettering and direct-lit designs for bold graphics. Check the power supply before installation. Leave ventilation around the LEDs. Clean acrylic with a soft microfiber cloth, not abrasive chemicals. Test brightness at the viewing distance. A board that looks impressive on a workbench may appear weak in a bright shop window. Reflective backgrounds can also reduce contrast, so testing matters more than assumptions.
Acrylic LED boards use energy-efficient LED modules or strips to illuminate engraved, edge-lit, or back-lit acrylic surfaces. The values below show representative nominal LED service-life ratings commonly used in signage specifications.
Edge-lit and back-lit boards commonly use LEDs rated around 50,000 hours, while compact decorative LED acrylic signs may use components rated around 30,000 hours. Actual service life depends on heat management, operating time, power quality, and installation conditions.
An acrylic LED board combines an acrylic panel with LEDs placed along its edges or behind its surface. Light travels through the material, creating an even sign, display, or decorative panel. Its performance depends less on appearance than on light distribution, heat control, and electrical quality. Choose the panel thickness and finish for the viewing distance. Thicker acrylic usually feels stronger, but it can add weight. Check brightness in the actual room, not only in a product photograph. Too much glare reduces readability. Also confirm voltage, power consumption, color temperature, and indoor or outdoor protection. A lower price may hide weaker diffusion or difficult replacement parts.
Before installation, measure the wall twice and mark cable routes clearly. Measure twice. The board should sit on a stable, level surface with space for ventilation. Do not press acrylic against hot equipment or seal heat inside a narrow frame. Use suitable fixings for the wall material, and keep wiring protected from moisture. Electrical connections should follow local rules and be handled by a qualified professional when required. For outdoor use, inspect the enclosure, cable entries, and drainage points before switching on. A small tilt can be obvious under bright LEDs. That detail is easy to miss.
Clean the surface with a soft microfiber cloth and diluted mild soap. Avoid abrasive pads, strong solvents, and excessive pressure around printed areas. Dust the ventilation gaps regularly, especially in workshops or busy entrances. Check for flickering, dark sections, loose connectors, or yellowing acrylic. These signs may indicate heat, moisture, aging LEDs, or a poor connection. Record installation details and replacement specifications while they are still available. No board is maintenance-free. I would also reconsider brightness after installation; the brightest setting is rarely the most comfortable.